


I have fallen completely in love with the fiber world. Aside from spinning, my new favorite craft is felting. It takes some time and muscle, but it’s also very forgiving. Anybody you talk to in the fiber world will tell you there are no mistakes. Just own whatever comes out, and everybody will believe you “meant to do that.”
St. Distaff’s Day is January 7. This is the day the women of the family traditionally return to their spinning and other fiber tasks. This means FIBER SHOWS! (Local spinners, weavers, and knitters guilds usually host these events, and you should be able to find one near you.) Fiber shows mean school cafeterias full of raw fiber, batts, roving, dyes, yarn … anything a fiber artist could want.
To make your own felt, you need to start with wool batts. Batts are bundles of fiber that have been combed into the same direction. This is some alpaca I carded, but wool will look very similar. I love the natural colors, but batts can be found in an color you could want.
Once you have your wool batt, the rest of your materials are really easy to find. Ready to give it a try? Let’s do it!
Materials Needed:
Two bath towels
One apron
A large sink, or a plastic tray with sides
1/4 cup soap flakes, or Dawn dish soap
1 gallon warm water
1 sheet plastic 24 x 36 (I use one side of a plastic feed bag, but you can also use a garbage bag)
1 sheet bubble wrap 24 x 36
1 nylon laundry bag cut in half 24 x 36
1 – 27-inch pool noodle
5 to 6 ounces of carded wool
Felting Procedure
Lay the bubble wrap right side up, then place plastic over bubble wrap.
Divide batts into very thin sheets. Create a first layer by slightly overlapping the batts at their edges and with all the fiber going in one direction. Make sure you stay on your plastic. If you have thin spots, fill them in with thin amounts of wool.
Create a second layer by placing the fiber in the opposite direction of the first layer.
First layer at left.
Continue creating thin layers and checking for thin spots in the wool layers as you go, until you have used up all your fiber. I was able to make four layers.
Go around the edges of your plastic and “tuck in” any loose ends. This makes a neater edge to your felt. Place the netting over the layers of fiber.
Roll up your two towels to make a dam around your project to contain the water.
Begin adding water, starting in the middle of your project and working the water to the edges with your hands. *You should use about half of the water in your container. Save the rest to use as needed.
Gently massage the layers to get the felting process started. The soap should start coming through the netting. Add more soap or water if necessary. Massage 1 to 2 minutes. Gently lift the netting off the project to make sure it’s not sticking. Replace the netting.
Carefully roll up the bubble wrap with the pool noodle, trying to retain the moisture within. Some people like to tie strips of fabric around the noodle/plastic/wool bundle to help hold it all together.
Using light, even pressure with your arms and hands, roll the tube back and forth on the table for 2 minutes (About 100 times).
Unroll tube and roll up from the opposite end. Retie if you wish, then roll the tube back and forth on the table again for 2 more minutes.
*Add water if and when it’s necessary. If there is loose fiber use a little extra soap to help “glue” the fiber down.
Unroll tube and carefully flip the whole project over, using the plastic to help, then remove the plastic. Roll up tube. Retie, then roll the tube back and forth for another 2 minutes.
Unroll, then re-roll from the opposite end. Retie, the roll the tube back and forth for another 2 mintues.
Unroll. At this point, your fiber should be pretty well felted. If it is, you can move on to the next step. If not, repeat rolling until felt is created.
Use the towels to clean up any water and remove the towels from the table. You’re done with the super-wet part now. Place your project in the plastic container, or in the sink.
Gently gather the edges of your project and drop the project into the sink. Repeat light dropping motion for approximately 4 to 5 minutes. The felt is pretty sturdy at this point and can handle it!
The felt will change during this time, “hardening” and developing “blisters” or wrinkles.
At this point, you can continue dropping until your felt is sturdy, or you can run your project through the washing machine. If you’re like me and want to use the machine, place your felt in a nylon laundry bag, set your washer to gentle cycle and cold water. Use a small amount of soap, and throw in a couple pairs of jeans or some towels to help agitate your felt. Remove your felt following the first wash/rinse/spin cycle. Lay it out flat to dry.
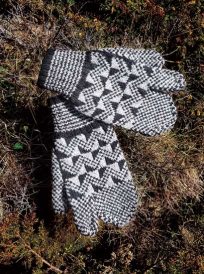
You can adjust the sizes of your bubble wrap, plastic, and mesh to make larger or smaller sheets of felt. Keep in mind the felt will shrink about 30 percent by the time it’s finished. Once the felt is dry, you can cut it and use it to make any number of projects. You can make mittens, hot pads, trivets, place mats, pillows, wall hangings, etc. The felt can be embroidered, needle felted, or appliqued. The possibilities really are endless. Have fun and see what you can come up with!
This is a trivet (in progress) that I made for my dad for Christmas. Next week, I’ll show the super-simple method for needle felting designs.

