
For urban and suburban folk, finding proper gardening space can seem like an insurmountable task. Margaret Park offers a welcome solution with More Food From Small Spaces (Great River Books, 2013), with tips to grow healthy, organic vegetables and fruits while maximizing garden space. This excerpt from the chapter “Making Food Last” if for when the crops are in and you’re faced with an important question: What do you need to know about fruit and vegetable storage?
More More Food From Small Spaces:
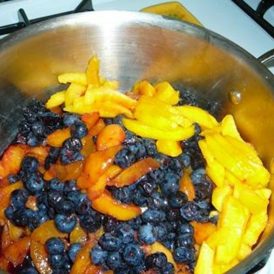
Dehydrating Fruit and Vegetables
Growing Your Own Vegetables in a Backyard Garden
How to Make a Solar Food Dryer
The goal of this chapter is to help you eat fresh vegetables as long as possible throughout the year. Fruit and vegetable storage is not likely to be a very time consuming task with small spaces, especially with an 8×16 foot plot. But if you do have a bumper crop that you need to move out of the garden — fall is usually the time when this happens — there are three options for food storage: canning, freezing and drying.
I have my definite preferences for fruit and vegetable storage. I always use a lot of canned tomatoes throughout the year and with concerns about the plastics that are used for lining the insides of commercially packed foods, I like to can my own. However, having some sundried tomatoes months later is desirable as well. This section of the book is not meant to be a comprehensive guide to food storage, but rather a personal account of suitable ways to make the food in your garden last longer. There are many books and sources of online information about canning, freezing and drying. My most unique offering in this chapter is showing how to make a simple, effective solar food drying arrangement that works very well to dry food with no power source other than the sun.
One of the saddest moments for the vegetable gardener is hearing news of an impending frost when tomato vines are still loaded with green tomatoes. After all, how many fried green tomatoes can a family eat? Since doing this intensive gardening, I’ve learned not to completely despair on these chilly fall nights. Many of these late tomatoes will eventually ripen if left out in bowls at room temperature. If the frost will only be light, it’s possible to preserve tomato plants by covering them with cloth or plastic overnight. If the temperatures are really going to dip, then it’s best to harvest all the tomatoes and give them a chance to ripen. I have been so very pleased with the number of these tomatoes that do eventually turn red. Last fall we were eating our tomatoes until the end of November.
Safely Canning Fruit and Vegetables
In 1974, chemists at the National Food Processors Association analyzed the contents of 100 year old canned foods that came from the stores of an old steamboat. They found that, although the contents no longer looked appealing, the foods were as safe to eat as the day they had been canned. If you’re looking for the longest shelf life, canning is probably the best option for food storage.
Many vegetables don’t have enough acidity to be safely canned using the simple boiling water bath method. If canning is your top choice for food preservation, then I suggest purchasing and learning how to use a pressure cooker for canning. Tomatoes, however, with the addition of some acidic substance like lemon juice or vinegar can be safely preserved by hot water bath canning methods. The most challenging part of processing the tomatoes is removing their skins. A few years ago I decided I would remove the skins upon opening my canned tomatoes, thus only investing a minute or two while cooking. Simply place a colander on top of a bowl; pour tomatoes into the colander; remove the skins; and collect the juice from the bowl. This saves a lot of time in the tomato canning process. There’s also no reason to remove the seeds. It’s been discovered that the most tomato-ey flavored parts of the tomato are the gelatinous pouches around the seeds. Wouldn’t want to lose that flavor by throwing the seeds away.
Anything pickled in vinegar, such as: cucumbers, okra, beets, etc. can also be safely canned in a hot water bath. If you have a lot of cucumbers, the only way to store them is to pickle them. I have discovered that decent pickles can be made from regular slicing cucumbers if you soak the whole cucumbers in an ice water bath overnight before pickling.
Always scrupulously follow safe canning directions and use fresh canning lids when preserving food in this way. Harmful, even life-threatening, bacteria can grow in carelessly canned foods.
Properly Freezing Fruit and Vegetables
Freezing is a good choice for many vegetables, though the shelf life of frozen food has limits. Most fruits and vegetables last about six to eight months when home frozen. However, tomatoes and peppers last only three months or so. If you plant a garden year after year, then six months to a year of storage is probably a long enough storage time.
I find that some of the best foods to freeze are greens that you would normally serve steamed or boiled. Greens, such as spinach, Swiss chard, turnip greens, etc. are usually served with a somewhat watery consistency anyway. To freeze these greens remove the stems and blanch the leaves in boiling water for a minute then transfer to an ice water bath for a minute, drain well, place in plastic freezer bags and expel as much air out of the bag as you can.
Peppers are remarkably easy to freeze. Cut peppers in half, remove the seeds and stem, and place pepper halves in a single layer on a tray in the freezer for several hours before placing them in plastic freezer bags.
Tomatoes are even easier to freeze. Pop them in freezer bags skins and all. The skins will come off easily when they’re placed in boiling water for a few minutes and allowed to cool a bit.
Most Vegetables Can Be Frozen by the Following Steps:
1. Dice or slice the vegetables
2. Blanch in boiling water
3. Immerse in ice water
4. Drain thoroughly
5. Spread out on a tray in a single layer for an hour or so
6. Place in freezer bags
7. Expel as much air as possible.
The amount of time to blanch in boiling water depends upon the vegetable and the size of the pieces. Generally two or three minutes is enough. Following are some specific guidelines.
Blanching/Icing Times for Common Vegetables
Beans — 2 minutes.
Broccoli, Brussels sprouts, and Cauliflower florets — 3 minutes
Cabbage — 2 minutes.
Carrot slices — 3 minutes
Parsnip slices — 2 minutes
Peas and snow peas — 1 minute
Zucchini can be steamed for a minute then placed directly in freezer bags.
Some vegetables, namely, beets and eggplants have to be sliced and fully cooked before freezing.
Reprinted with permission from More Food From Small Spaces: Growing Denser, Deeper, Higher, Longer Gardens by Margaret Park and published by Great River Books, 2013.

