


Ripe elderberries bring sweet rewards to gardeners. Photo by Getty Images/pejft.
If you’re searching for an easy-to-grow plant that gives back to you in many ways, consider the elderberry. I can’t think of any plant on my suburban farm that’s so versatile and trouble-free. With only minimal care, an elderberry plant will produce generous harvests of flowers and berries that you can turn into a wealth of culinary and medicinal creations, among others.
The Basics
Two species of elderberry are commercially grown, and therefore most available at nurseries as cuttings or plants.
The American elderberry (Sambucus canadensis) is native to the eastern half of the United States. It grows as a slow-spreading clump of canes 6 to 12 feet tall. There’s a lot of diversity among wild-growing elderberries, but generally they have smaller berries than the cultivars available at nurseries and garden centers. In my experience, it’s certainly worthwhile to plant some of the cultivars with larger berries.
The European elderberry (S. nigra) can be found in Great Britain and northern Europe, and is usually seen as a multi-stemmed shrub or small tree that grows up to 15 feet or more. As with the American elderberry, there’s a lot of diversity among wild
plants, but a number of named cultivars are available that have superior vigor, productivity, and berry size. An added bonus of the European cultivars is their fragrant flowers.
A third species of elderberry, S. caerulea, grows wild in the western portion of the United States. Commonly called blue elderberry, it grows up to 30 feet tall. It’s not generally available from nurseries. No cultivars are available, though some nurseries sell seedling plants.
Growing Necessities
Elderberries aren’t particularly fussy about growing conditions, but the plants do need good drainage. If a site doesn’t drain well, you should find another planting location, preferably one on a mound or other raised area. Keep in mind that elderberries need room. The American varieties will grow 6 to 12 feet, depending on variety and location, and they’ll slowly spread by underground rhizomes until they form a thicket-like growth. Depending on your inclination, you can easily control this spreading by cutting off the emerging top growth, or you can leave it to spread. The plants will fruit best in full sun, though they can also do well in partial shade.
Freshly picked elderberries being prepared for use or storage. Photo by Getty Images/triggerpics.
The European cultivars all grow up to about 10 to 15 feet, though they can be pruned to a smaller size. They grow as multi-stemmed small trees or large shrubs, and do best in full sun. I’ve found the European varieties to be fussier and less vigorous than the American varieties, though this’ll depend to a great extent on your local climate and conditions. It’s always best to trial a small number of plants before you plant large numbers.
Harvesting & Storing Berries
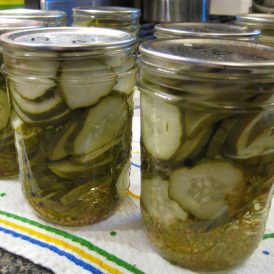
Elderberries will turn dark purple, almost black, when they’re fully ripe. The exception is the blue elderberry, found in the western United States, which turns more of a sky blue. Harvest only clusters where all the berries are ripe. If there are a few green berries, they can easily be culled at some point in the process. Cut the berry clusters off the plant, and don’t leave the berries in full sun for too long while you’re harvesting. If you can’t tend to the harvested berries right away, they can be stored in a refrigerator for up to 12 hours. If you aren’t using the fresh berries, you can either freeze them or dry them for later use.
I find that freezing is the easiest way to store my berries. After I pick the ripe umbels (the fancy name for the flower or berry clusters), I transfer them to the freezer. If you wish, you can dip the clusters in water to remove any small insects or other organic matter, but if you do, make sure to thoroughly drain the clusters on a clean kitchen towel so the berries won’t ice together when you freeze them. If you choose to simply freeze the clusters without washing them, this will also kill any insects that might have been hiding within the cluster.
Once the umbels are frozen, it’s easy to strip off the berries. I strip them into a large bowl, and then transfer them to a zip-close bag in the freezer until I need them. Don’t leave berries outside the freezer too long once they’re stripped off the clusters, as they’ll become mushy and hard to handle when they thaw.
If you don’t have freezer space or can’t preserve your finished product (juice or syrup), then drying is another option. Remove the berries from the stems, give them a rinse, spread them out on a kitchen towel to remove excess moisture, then carefully put them in a dehydrator until they’re completely dry, at which time they’ll look like small raisins. If you want to forgo using a dehydrator, you can simply spread them out on a baking sheet and put them in a warm location (out of full sun) until they’re dry.
Attracting Wildlife
Even if you have little intention of using the berries or flowers, elderberry plants are great for attracting wildlife, especially birds. I have a love-hate relationship with my birds. I love attracting them to my property, but I’m not happy about sharing my harvest. That said, if you like birds, consider adding elderberry to your landscape. The dense growth of the plants will offer cover and nesting space for birds, and the berries are a favorite of a long list of fruit-eating avians. Last year, when I went to prune a row of European elderberries on my property, I found a nest in every single tree.
If deer frequent your property, you’ll notice that elderberries are high on their snack list, too. The young shoots are particularly susceptible to deer browsing, so be sure to protect the plants while they’re rapidly growing in spring.
Birds love elderberries, so be prepared to share your havest. Photo by Getty Images/Andyworks.
Using the Flowers
Elderflowers can be used for a variety of preparations, and an added advantage of using the flowers is that you don’t have to fight the birds for your harvest.
Flower clusters should be picked when all, or almost all, the tiny flowers have opened and before any of them have started to turn brown.
I’ve found that a good time to harvest flowers is in midmorning, after the dew dries, but before the heat of the day arrives. And it’s worth noting that since most of the flavor and aroma is in the pollen, it’s best not to harvest the flowers immediately after a rain.
Drying is the best method for preserving elderflowers. To do so, carefully remove the small flowers from the cluster, removing as much stem material as possible, and then either spread the flowers out on a baking tray in a warm place, or put them into a dehydrator fitted with a screen, so the flowers won’t fall through the openings. Another option is to dry the flower clusters themselves after trimming off as many of the thick stems as possible. After they’re dry, it’s easy to remove the flowers from the stems. In any case, the flowers dry relatively quickly.
Elderflowers at their peak being harvested. Photo by Getty Images/Zbynek Pospisil.
Miscellaneous Uses
The berries can be used to make a natural ink, or a dye for yarn and clothing. The long canes of the plants that are pruned in late fall can be used to create wattle fencing. And, of course, the berries and flowers can both be used in food and beverages.
Recipes
Helpful Tips
Elderflowers:
- Harvest elderflowers when they’re at their peak, which, depending on your location, will be late spring to early summer.
- To pick elderflowers, clasp your fingers at the base of the flower cluster and pull, leaving most of the stem. If you’re planning to use them to make fritters (see Page 68), you’ll want to keep some of the stem attached so you’ll have something to hold onto when dipping the flowers in the batter — but never eat the stems, as they’re toxic.
- To store elderflowers, hang the umbels upside down or lay them on a screen until they’re dry, which takes several days. Once they’re dry, rub the flowers between your hands so they drop off. Store them in a paper bag in a cool, dry place.
Elderberries:
- In its first year, an elderberry plant will produce only a small crop of fruit. Its second year will be its most productive. By the third year, fruit production will slow down, especially on a plant that hasn’t been pruned. Prune annually for best results.
- Harvest elderberries when ripe, generally between mid-August and mid-September, depending on your location. Ripe berries will be deep purple (almost black), plump, and hanging upside down on the plant.
- Pick elderberries on a warm, sunny day. Use scissors to cut the cluster of berries off. Discard the leaves and stems, because both are toxic.
- Elderberries are extremely perishable, and need to be eaten, frozen, or dried within 12 hours of harvesting them, or they’ll begin to ferment. Store fresh berries in the refrigerator, and eat them as quickly as possible.

